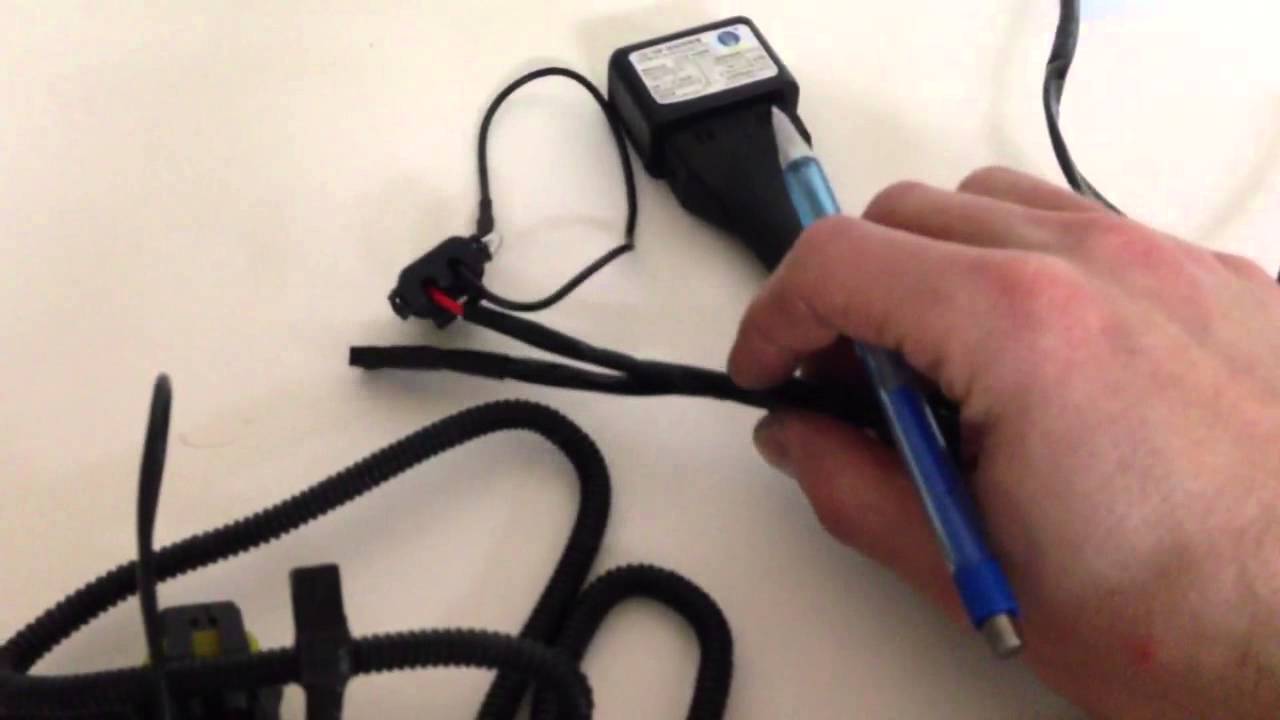
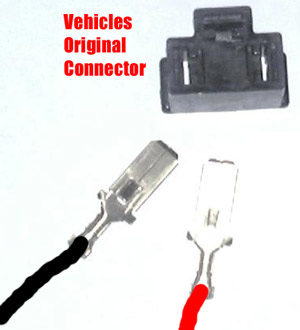
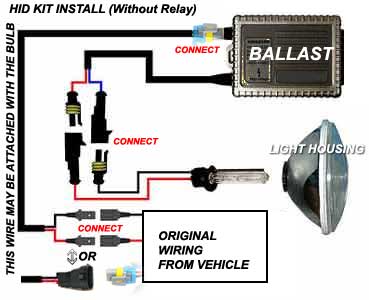
Open the back cap of the headlight assembly and take out the stock bulbh13 plug wiring diagram september 6 scott xenon 2 comments bixenon instructions h13 installation h13 plug wiring diagram hid install hid wiring more and more h13 bi xenon bulbs are being used in automotive applications. Below are the simple steps to connect your plug and play hid conversion kit.

Automotive Time Delay Relay Applications
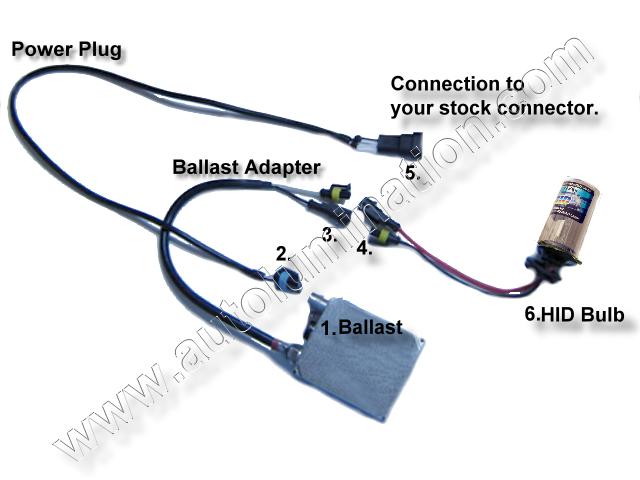
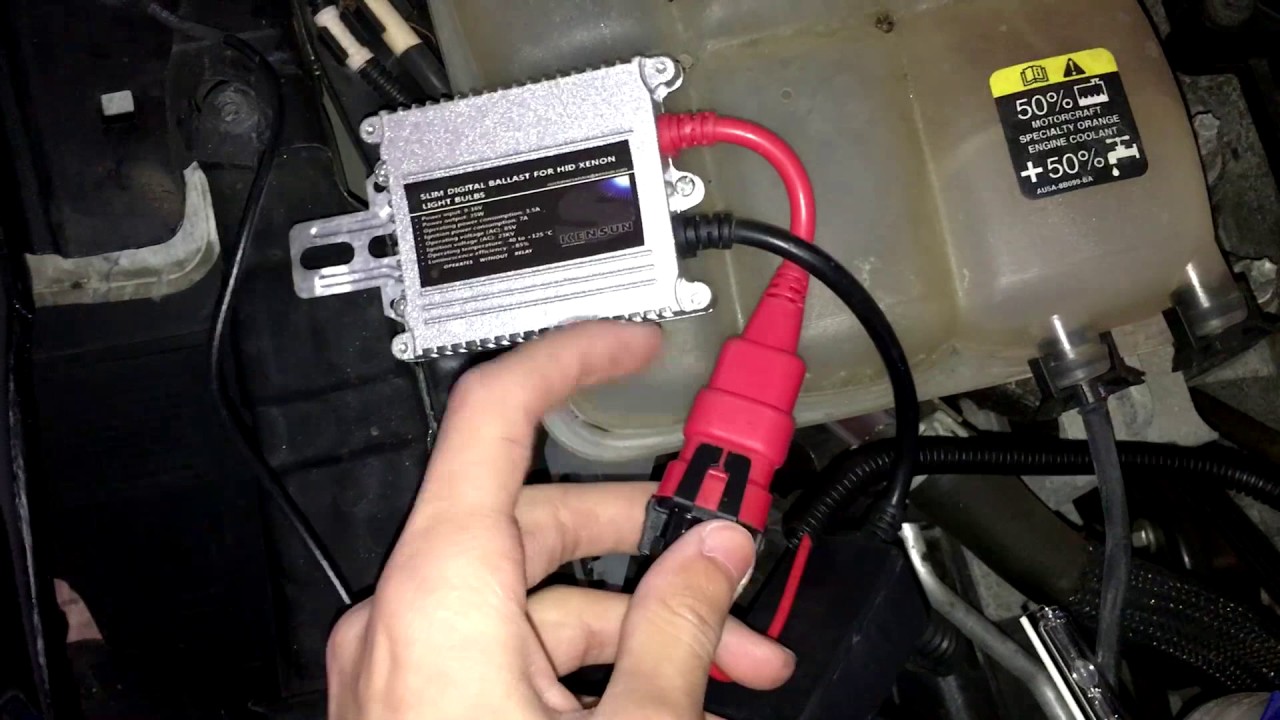
Xenon hid wiring diagram. Ensure that you get the polarity correct. Lifetime warranty and free shipping. Connect the ignitors to the ballasts does not apply to our moon series 35w canbus kits. If you have a bi xenon kit connect the ballasts to the relay harness. Open your vehicles hood. Make sure that the plugs are securely placed and firmly intact.
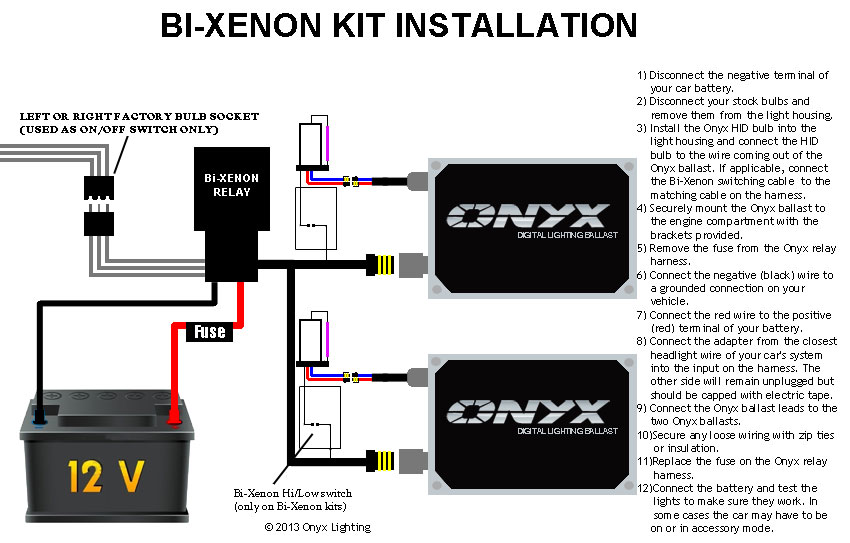
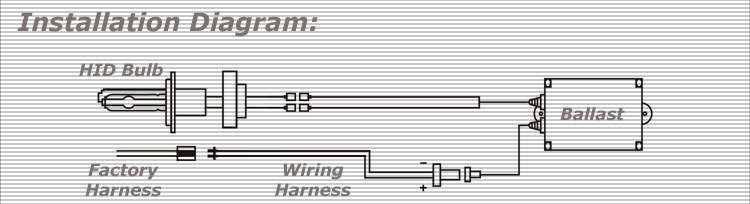
The following manual contains detail explanation on how to install the hid xenon headlight conversion kit from jem automotive and its wiring harnessthis conversion kits contents of 2 xenon hid bulbs 2 ballasts ballast mounting brackets 1 heavy duty wiring harness with relays mounting nuts bolts and washers. This installation guide uses our galaxy series 55w canbus hid kit. Connect all the plugs from the ballast to the bulb as shown in the diagrams. Hid lights do not work with reversed polarity. Connect the hid bulbs to the ignitors.
Gallery of Xenon Hid Wiring Diagram