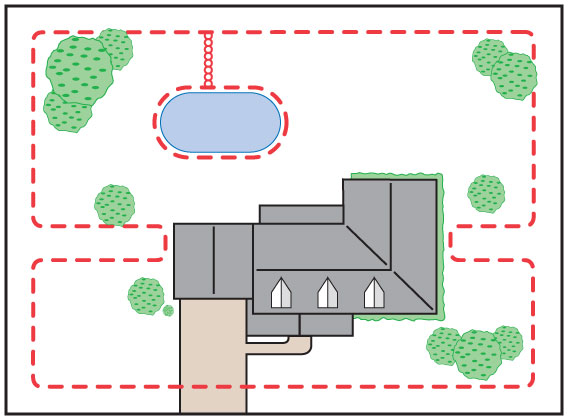
Wire loop attached to existing fence double loop this layout allows you to include your existing fence as part of your layout and keep your pet from jumping out or digging under your existing fence. This lake loop effectively creates an exclusion zone within the.

Petsafe Rechargeable In Ground Fence
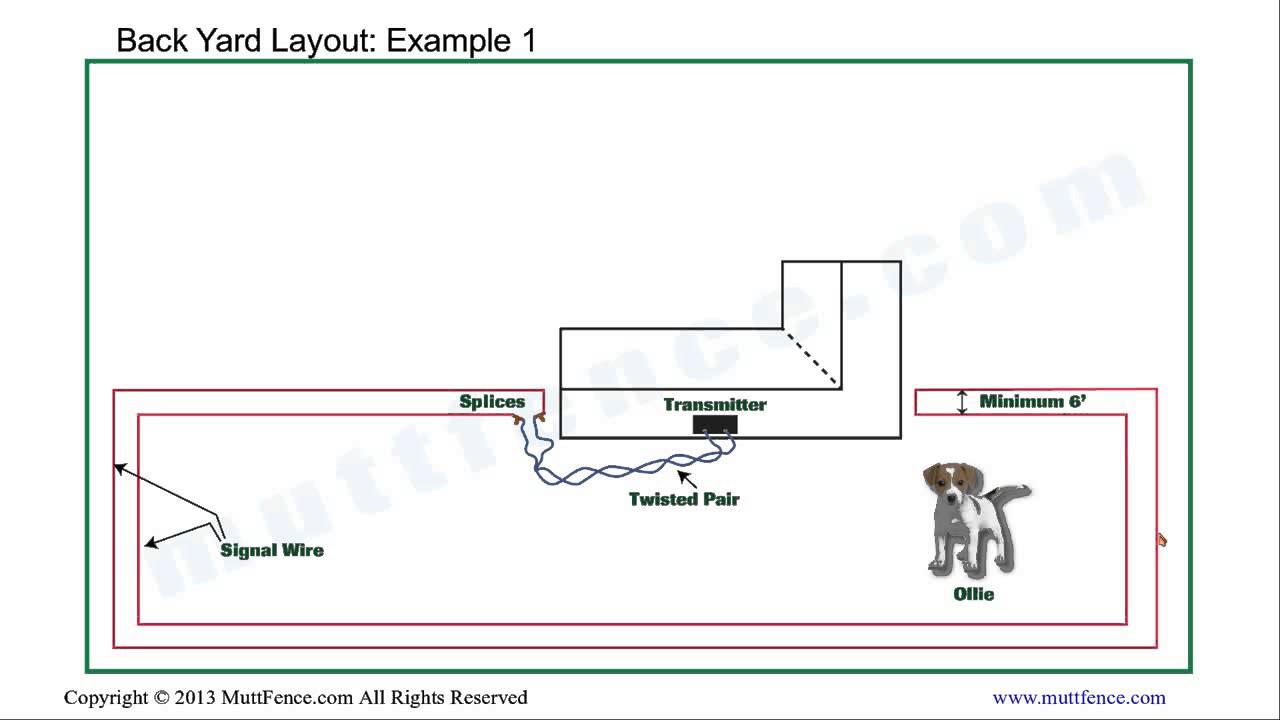
Petsafe wiring diagram. It reduces the amount of wire which will need to be buried. This means there is a wire leading from the transmitter and the wire goes around your yard and returns to the transmitter. We never admit that the image is our image the copyright is in the image owner we only help our users to find the information they are looking for quickly. Twisting the boundary wire cancels the signal and allows your pet to cross over that area without receiving a static correction. Petsafe wiring diagram disclaimer. Plug the power adapter into the power jack and a 120 volt.
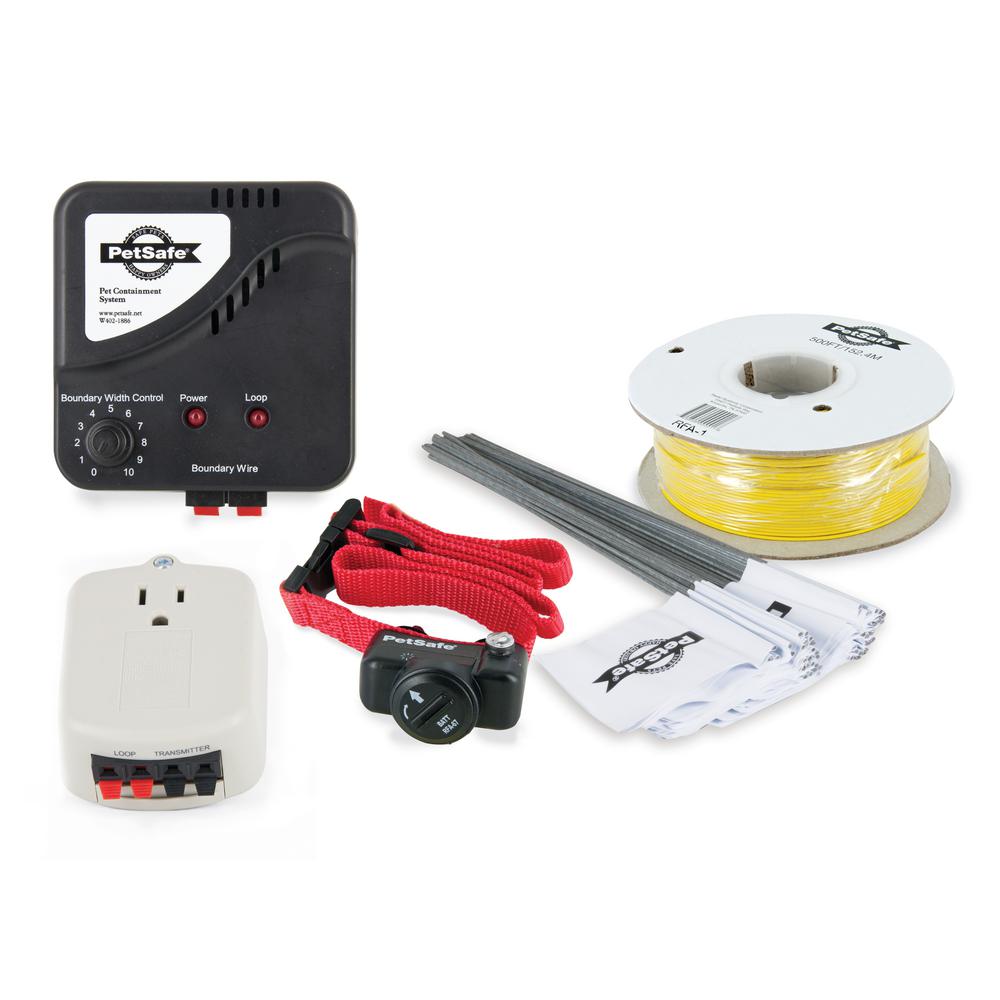
If you want the image to be deleted please contact us we will delete it from our website. Strip the wire coating ends of the boundary wire approximately one half inch exposing the copper wire. Wire nuts mounting bracket surge protector long contact points b a t e r y 6 v r f a 6 7 in gr ound fen ce op. Turn the boundary width control knob to 10. You can run a twisted line from your perimeter wire to an interior area within the perimeter of your dog fence. Run the wire from the fence.
This diagram demonstrates the only other way you can use twisted wire during the installation of your electric dog fence system. When twisting wire you must be twisting wire that completes the radio signal circuit. Insert the boundary wires into the boundary wire terminals on the fence transmitter. Using twisted wire for interior loops. This will set the warning zone at the maximum width.
Gallery of Petsafe Wiring Diagram